SHAPING NOTE PITCH part 2
Topics: the shape view
Part 1 covered the basics of shaping note pitches. Part 2 will provide some insight into how shapes work the way they do, as well as a background into creating your own custom shapes with even more controls.
Before we start, let's make one distinction clear: The end result of a shape is that as a user you can have essentially an envelope applied to parameters of your MIDI events. The following discussion is not about how to create shapes, it's about how to create a structure that provides controls for manipulating the shape properties. It's the difference between having an envelope that looks like a sine wave but can't be manipulated, and having an actual sine wave that lets you change the cycle and other properties. The shape structure defines the controls available to users.
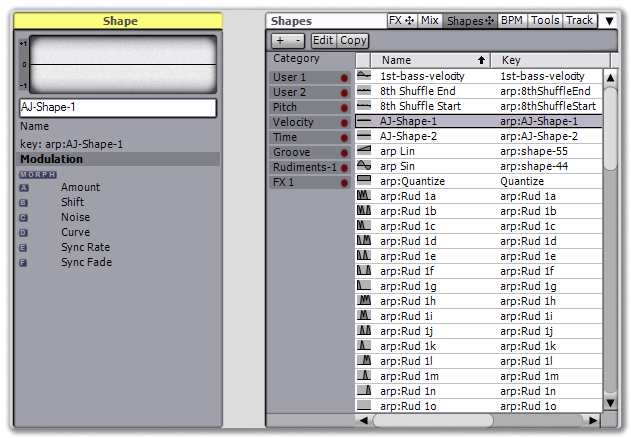
Let's start by taking a close look at the actual structure of the shape used in the previous example. Download Shape 1 and place it in your custom shape directory (Windows Start menu, My Documents->Angry Red Planet->Temper->shapes). (There's no reason to shut down Temper while you do this, the new shape will load automatically). Click on the Shapes browser tab highlighted below
 |
 |
| the shape browser |
Either press the Edit button or double-click the shape to open the shape editor.
 |
| the shape editor |
Shapes are typically composed of multiple smaller shapes. Let's look at what each one does.
The Sync shape is used to fit the shape to measure boundaries (or half note boundaries, or quarter note boundaries, etc.). By default it's off.
 |
| the Sync shape |
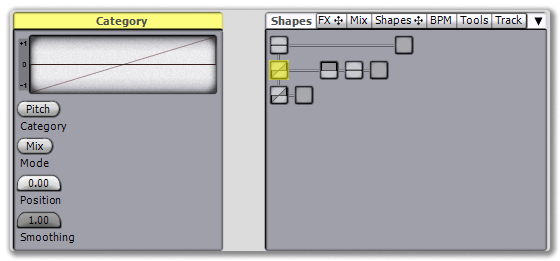
The Sync shape is composed of three shapes, starting with a Category shape. This shape is used to morph between all shapes in the selected category. The Position control is used for the morph.
 |
| the Category shape |
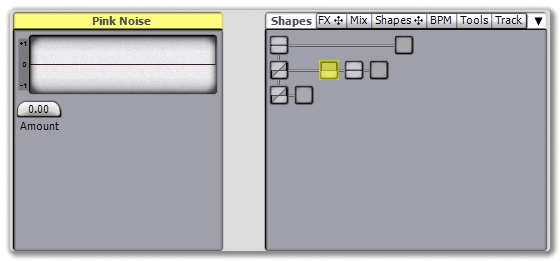
The Category shape is then run through a Pink Noise shape for a bit of randomness. This shape is off by default.
 |
| the Pink Noise shape |
The Pink Noise shape is then run through a Scale shape, to allow the user to position the final shape. This is the shape that provides the Amount and Shift controls.
 |
| the Scale shape |
There's one last shape: The Category shape contains a default Linear shape, for when the user hasn't selected a morph value yet.
 |
| the Linear shape |
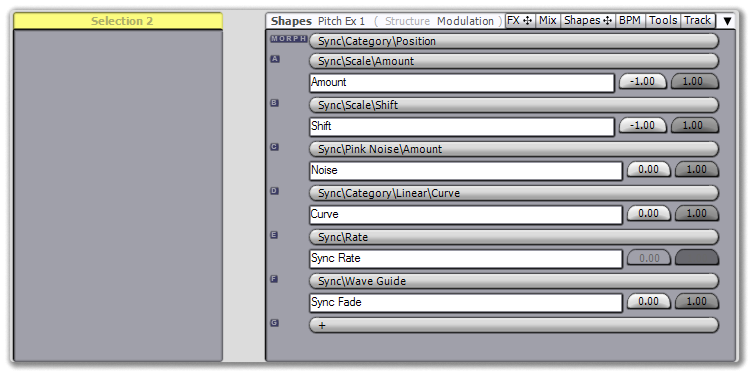
That's a look at the basic structure, but there's one more aspect to a shape: The Modulations. This is where you set the controls available to users and give them appropriate names.
 |
| the modulations |
That's a look at the existing shape, the shape that is used by default whenever you expand the Note section of the Notes inspector described in part 1. (The Velocity section uses a nearly identical shape that has the Velocity attribute selected in the Category shape)
Now we're going to turn it into a shape with even more controls. Download Shape 2 and install it in your shapes folder. It will appear as AJ-Shape-2 in the shape browser.
 |
| the AJ-Shape-2 shape |
We've made one modification: We've added a Math shape between the Category and Pink Noise shapes.
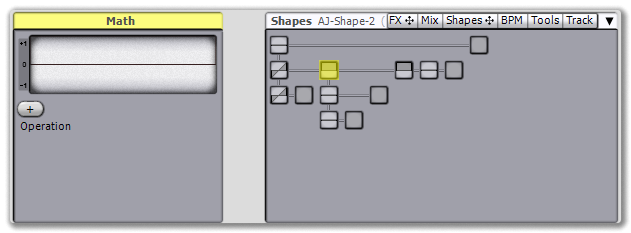 |
| the Math shape |
The Math shape is set to add, and inside this shape we've created a second Category shape with the Velocity category selected. Then, in the Modulation page, we've added the new Category shape's position as a parameter called VFX. The result of this is to add an additional control when using this shape: It will let us morph between all of the velocity shapes in the system, adding them to the current shape.