SHAPES
IntroductionEditing
Main View
Manage Bar
Polarity
Parameters
Morph
Managing
Creating
Structure
Automation
INTRODUCTION
 |
 |
 |
| linear | linear random | stepper |
Shapes control how data is transformed throughout the system. They are found extensively throughout Temper, and what exactly they do depends on where they are used. This will make the following discussion a little abstract: It's recommended you read the Editing section to understand the basics before continuing, then return to the Managing and Creating sections when you're ready to explore shapes more fully.
Think of a shape as a simple map that just takes one value and turns it into another. Shapes can be complex objects, so it's helpful to think about them in two ways: Both as a map performing a transformation, and as a wave that can be manipulated based on the current parameters. For example, a linear shape can have a noise shape applied, providing you with a noise amount parameter to manipulate.
There are typically two ways a client might use a shape: Either to transform a value (for example, inverting all volume controls so low is high and high is low), or applied to time (for example, a custom shape used in the Flip tool can control how much flip is being applied at any given point in time). These are not the only ways shapes are used, but specific details require knowing the specific context. For now, we'll discuss the basic editing operations common to all shapes.
EDITING
 |
| linear random |
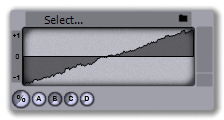
Shapes are edited in a standard shape view composed of five parts: The main area is taken up by a display of the shape, the top is the manage bar, the left is the polarity, the bottom is the current parameters, and the right is the morph.
Main View
The main area displays the current shape. Shapes are edited primarily through the parameter buttons, but step sequencer shapes and envelopes can be directly edited with the mouse.
Many times you will find yourself working with shapes that have very small values -- for example, they might range only a little above or below zero. Working with these shapes at the normal magnification would be impossible, so the shape view will automatically zoom in as the range gets smaller. This is signified by the background getting lighter in color.
 |
 |
| start and end is 0.30 | start and end is 0.10 |
Manage Bar
The optional management bar has one or more parts: On the left is a 'b' button for complete editing of the shape structure in the Browser (see the Creating section below). In the center is a Select... button for selecting a different shape from the list of installed shapes. On the right is a file button for directly loading and saving the shape.
Polarity
Shapes can be either unipolar (values range from 0 to 1) or bipolar (values range from -1 to 1). Typically, Temper uses unipolar shapes to replace values and bipolar shapes to shift values, but like everything about shapes, you need to consult the documentation for the FX or tool you're using to know exactly what's going to happen. You can click on the polarity range to flip the shape between unipolar and bipolar.
Parameters
The parameter buttons provide quick access to a shape's main parameters. What parameters are available for the most part depends entirely on the shape, but many shapes will have a '%' button for controlling the amount (i.e. a wet/dry mix).
Morph
The morph slider will not always be available, but for shapes with a morph you can use it to crossfade between each shape for rapid experimentation.
Below the slider is a smoothing button. If it's available, it will display the current smoothing mode, either a ramp to indicate the morph will crossfade between shapes, or a step to indicate the morph slider will simply select each shape available. There's little reason to step through the shapes, except when using the Groove shape available in the Quantize tool.
Note: The morph control is not used by all shapes, and might be deprecated in a future release.
MANAGING
Press Shapes from the Browser to open the shape manager.
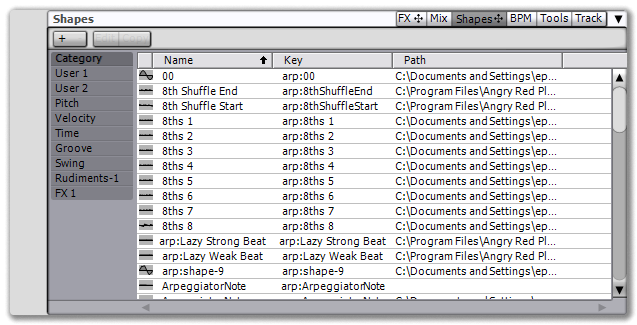 |
| the shape manager |
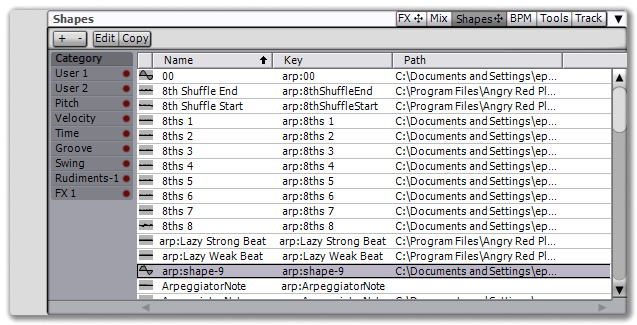 |
| the shape manager with categories available |
CREATING
It's convenient to think of shapes as standard synthesizer concepts like LFOs and envelopes (and Temper includes such things as sine waves, triangle waves, etc.), but in fact most shapes are merely building blocks. This is because Temper shapes are typically complex objects, composed of other shapes. Shapes really have two purposes: To provide a generic way to transform data, as mentioned, but also to publish a set of parameters to give you realtime control over what they look like.
Edit a shape by selecting it in the shape manager and pressing the Edit button or double clicking on the shape. This opens the shape editor.
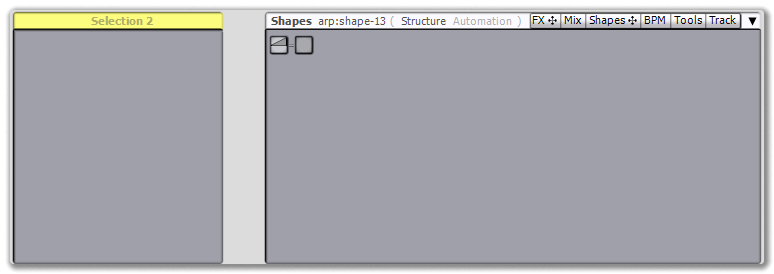 |
| the shape editor |
Structure
The right view is used to edit the structure of the complex shape (right click to remove or added a new shape in an empty slot), the left view is used to edit the parameters of a single shape (left click on a shape to open it in the Selection 2 view).
Shapes multiply data from left to right. In the following example, we'll start with a single Linear shape:
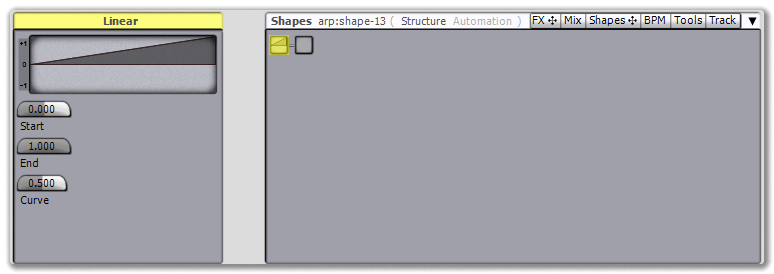 |
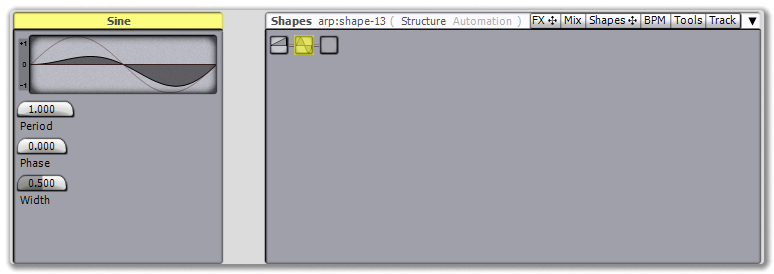
Now, let's right click on the empty shape slot and select Sine (note there are also Sine- and Sine+, for wholly positive or negative sine waves, we'll choose the normal Sine). When the second shape is added, it becomes selected and the Selection 2 view updates to display the result, which is that the two shapes are multipled together, resulting in a sine wave that tapers off linearly.
 |
Automation
We mentioned earlier that one of the purposes of shapes is to expose a set of parameters for altering them. This is done by clicking on the Automation page in the Browser.
 |
| the shape automation page |
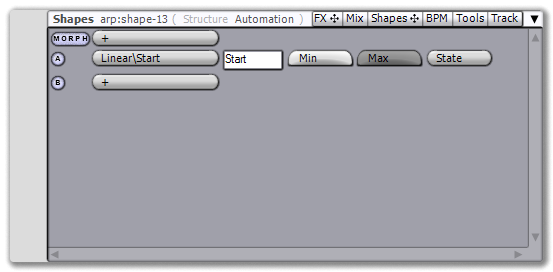
This page defines which MIDI macro controls which shape parameter. There are currently two types of sources: The morph control is distinct from the lettered control because it shows up in the interface as a slider next to the shape view, whereas the lettered controls are a series of buttons.
Add an automation destination by pressing the + button. There can only be one morph destination, but you can add multiple lettered destinations. As soon as you add a destination, you can provide a label and range values.
 |